A double moon transit across Jupiter.
Photographing planets is different than photographing deep sky objects. Gone are the long hours at the guiding eyepiece. Using extension tubes was a common practice ten years ago. However, that approach is no longer in vogue. Now it is common to use CCD cameras or webcams for imaging. If you are going to use a CCD camera, it will require quite a bit of funds. However, using webcams or "planetary imagers" sold by many telescope manufacturers is much simpler and less expensive. For about $50-100, you can get a good quality webcam that can produce exceptional results.
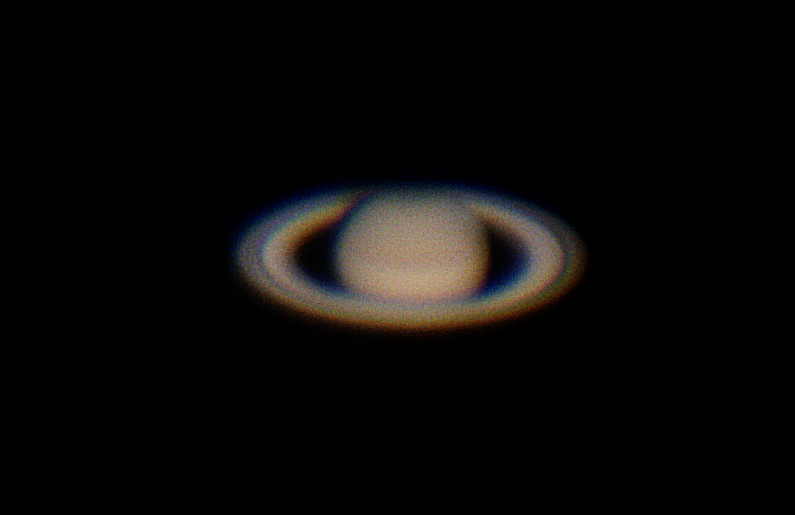
Some of the most important factors involved in purchasing a webcam is to make sure it can produce movie clips with a resolution of 640X480 or greater. This eliminates many of the less expensive cameras on the market. I started with a logitech quickcam pro. The results I got with that webcam were very good but then upgraded to a microsoft lifecam, which gave HD video. Originally, I used my Meade 10-inch LX50 but I have since have moved on to Orion's all-in-one camera and their 180mm Maskutov, which seems to work very well. I am still in the testing phase (2015) but the results have been promising as this image of Saturn reveals. This image was taken with Saturn low on the horizon. Had it been higher in the sky, the results would have been better. NH, with its northern latitude and poor winter/spring weather does not usually allow for good planetary image of planets when they are high in the sky unless you get up very early in the morning during summer months.
Once the webcam is attached to the scope, it is best to start with the moon. Focus on the moon with the webcam. Make sure you adjust the camera shutter speed to the correct setting when focusing. Take your time focusing. When you are satisfied with the focus, remove the webcam and insert an inexpensive eyepiece. You may have to add some extra exentions on to the barrel of the eyepiece. Slide the eyepiece in and out until the object is in focus. DO NOT TOUCH the scopes focus. Mark the barrel of the eyepiece so when it is placed in the tube, it will be in focus at the same point the webcam is in focus. This will be helpful when focusing on planets.
A key point about the telescope is that it needs to be in collimation. Refractors do not require this but Schmidt-Cassegrains and reflectors do. It is key to get good collimation to sharpen up your planetary images. Verify the scopes collimation before you even attempt any planetary imaging. It can make the difference between an acceptable image and an outstanding one. Some of my early attempts at imaging Mars were not as good as subsequent efforts. Most of this is probably due to a poor collimation of the optics.
Another important item is sky conditions. A windy night will cause the images to wiggle or blur. This will cause your image not to be sharp no matter how many precautions you take. The best time is when the atmosphere is stable. It is also important to allow the scope to equalize with ambient temperature. Wait at least one hour after you mount the scope before you start shooting. Long ago, I would have not bothered under unstable conditions. However, webcams can be used to record video clips, which are made up of hundreds of images. With the right software, the bad ones can be eliminated leaving only the good ones for creating a final image. The best software I like to employ is Registax, which is freeware. I will not go into how to use the software since others seem to be better at it than I am. If you want to read expert imager Don Parker's article on the subject, get a copy of January 2007's Sky and Telescope. For online help, this webpage is helpful. There are plenty of other imagers out there with their own techniques. I suggest beginners follow the tutorials and then experiment until they find the right method for them.
The most important thing about recording planetary video clips is to make sure you take a lot of them. I usually take clips of 30-40 seconds each. The end result can produce some pretty good images.If the clips are taken close together, you can stack the resultant images to improve the quality. I have good results with this methodology with all planets except Jupiter, where it's fast rotation time prevent stacking images more than a minute or so apart.
To setup for imaging, I like to use is my 10" SCT and a 2X barlow. I have employed a 2.5X and 3X barlow but those usually do not provide the best image quality. It may have something to do with the optics or the magnification of imperfections in my optics/observing conditions. It also can have something to do with slower shutter speeds on the camera. In any case, F20 works very well for me and the image scale is excellent for Jupiter, Mars and Saturn. I have found that Venus needs to be recorded in the daytime when it is not as bright. I have not imaged mercury to date but it would probably require daytime imaging as well.
Planetary imaging use to be a chore of taking dozens of images and hoping for a few to come out clear. Now it is a matter of taking lots of video clips and creating the best image possible. Focusing can be evaluated right away and you can evaluate the quality of the video pretty quickly. To me it is much more fun today than it ever was when I used to take with my Nikon and Ektachrome 200. Anybody interesting in trying astrophotography, I encourage them to try webcam photography first. It is relatively inexpensive and can be a lot of fun.
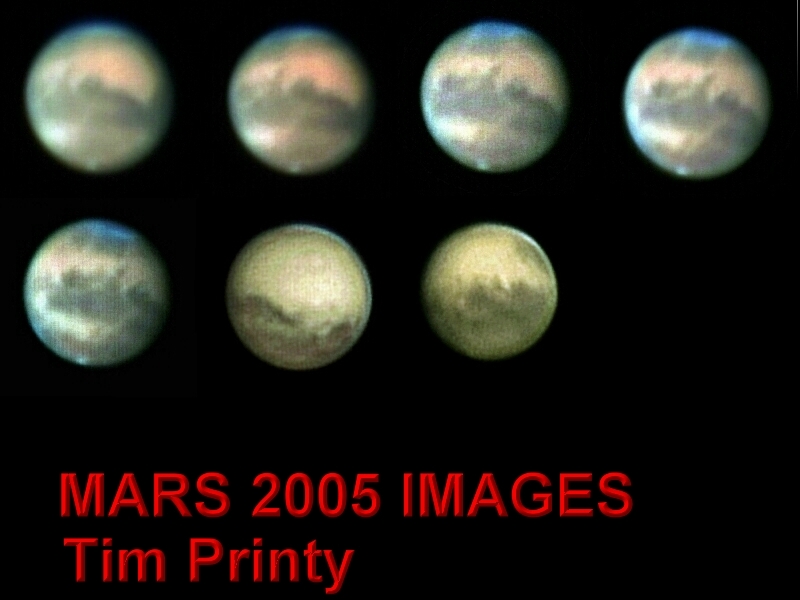
Some images of Mars I took in 2005 using a logitech quick cam pro. These were a great improvement over my 2003 images.
Go back to page 1 of ASTROPHOTOGRAPHY GUIDE